How to turn a PowerPoint into a SCORM course
Updated 1 October 2026
You have a slide deck and an LMS that wants SCORM. Here's how to get from one to the other in a few minutes, and how to make the result better than the deck.
1. Check the deck
- Save it as .pptx. Older .ppt files need opening in PowerPoint and saving again (File, Save As, PowerPoint Presentation).
- Give every slide a title. Titles become the slide headings learners see, and the names in the editor's slide list.
- Put what the presenter would say in the speaker notes. ZipCourse brings them across as notes, which learners can read under each slide.
- Hidden slides are skipped, so hide anything learners shouldn't see.
2. Import it
Open the editor and drop the .pptx file onto it, or choose Browse files.
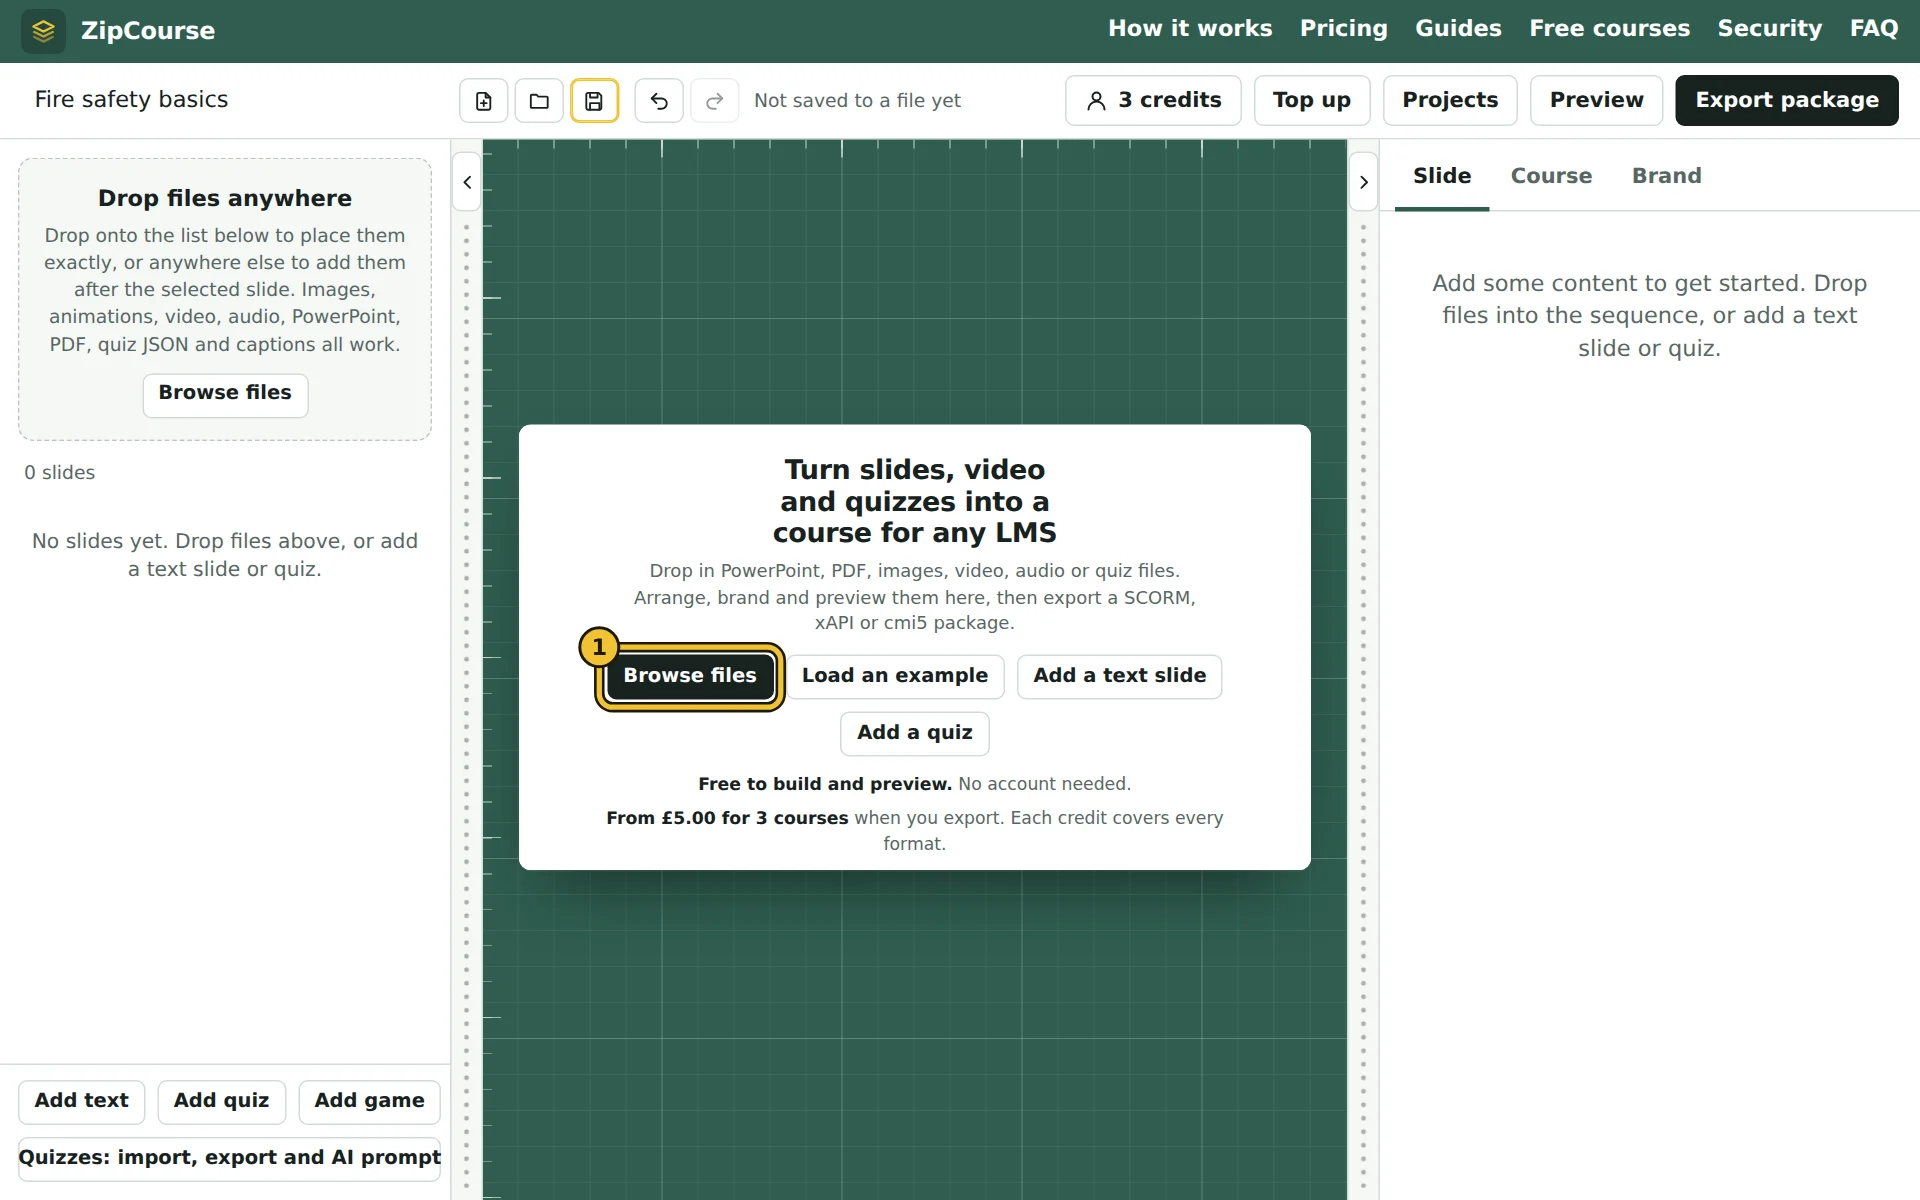
- 1Browse files, then choose your .pptx. Or drop the file anywhere on the editor.
Each slide becomes an editable slide with its title, text and bullet points, links, tables, its main picture and its notes. Video and audio embedded in the deck come across as slides of their own.
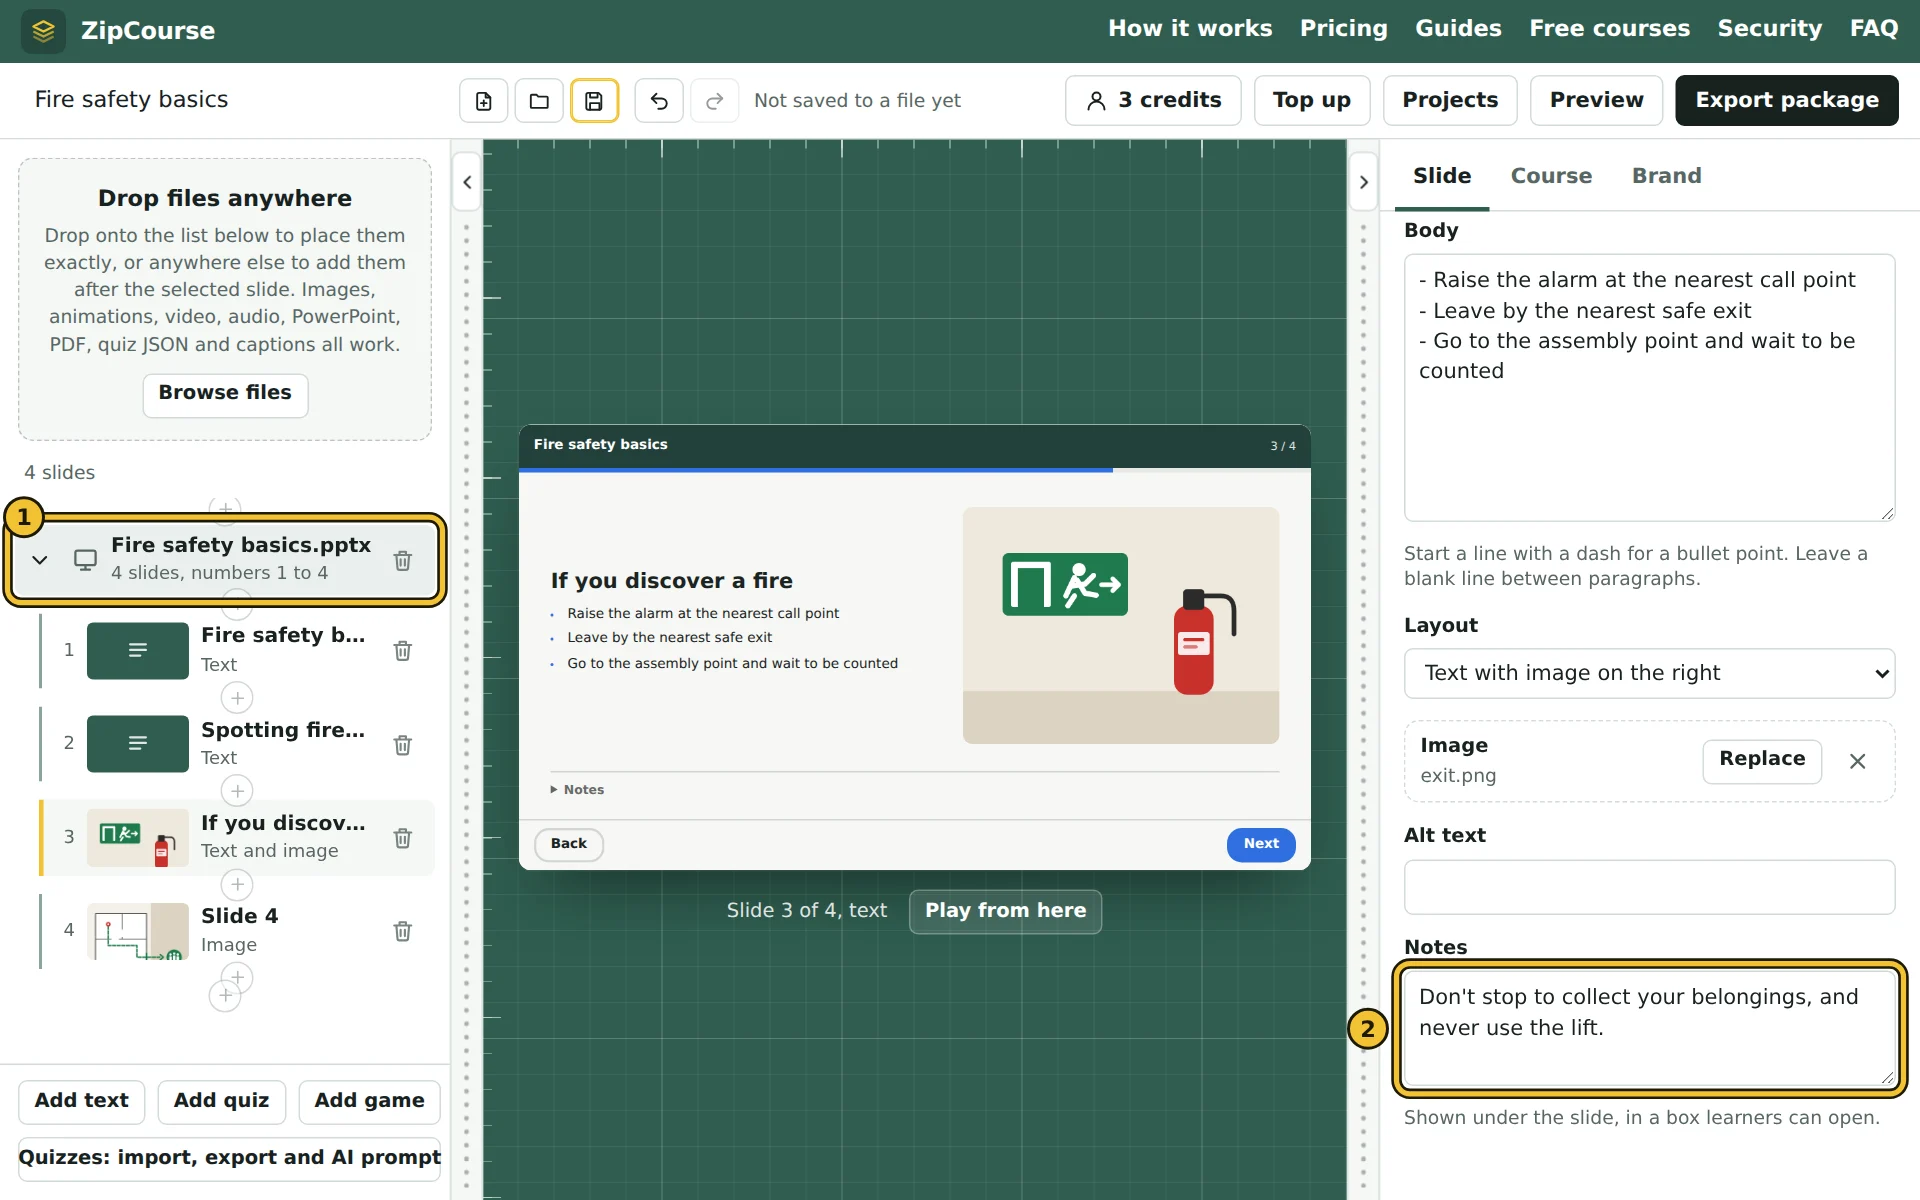
- 1The deck, as a group of slides named after the file. Click a slide to see and edit it.
- 2The slide's speaker notes, now its transcript.
What doesn't come across: animations, transitions, and exact positions of text boxes. ZipCourse lays slides out cleanly for any screen size instead. If a slide must look exactly as designed, such as a diagram or an infographic, export it from PowerPoint as a picture (File, Export, PNG) and drop the picture in. You can mix both in one course.
3. Make it work as e-learning
A deck made for a room needs a little help to work on its own:
- Add narration. Picture slides can carry narration: record yourself reading the slide's notes (your phone's voice recorder is fine) and add the audio to the slide. This pairs well with slides exported from PowerPoint as pictures. For a text slide, an audio slide straight after it does the same job.
- Cut the walls of text. Edit text slides right in the editor. Short points, one idea per slide.
- Link to the details. Type a web or email address into a text slide or its notes and learners can click it. Web links open in a new tab, so the course stays where it was. To link words instead of showing the address, write them like this:
[fire policy](https://intranet.example.com/fire). Links in the deck come across the same way. - Add a quiz. A few questions at the end turn "viewed it" into "understood it", and give your LMS a score. The AI quiz guide shows how to write one from the same deck in minutes.
- Brand it. In Brand, add your logo and press Generate colours until you like what you see. Every palette passes contrast checks.
- Reward a perfect score. Turn on bonus games and learners who ace a quiz first time get a 30-second game, or add a game slide as a break. See adding games.
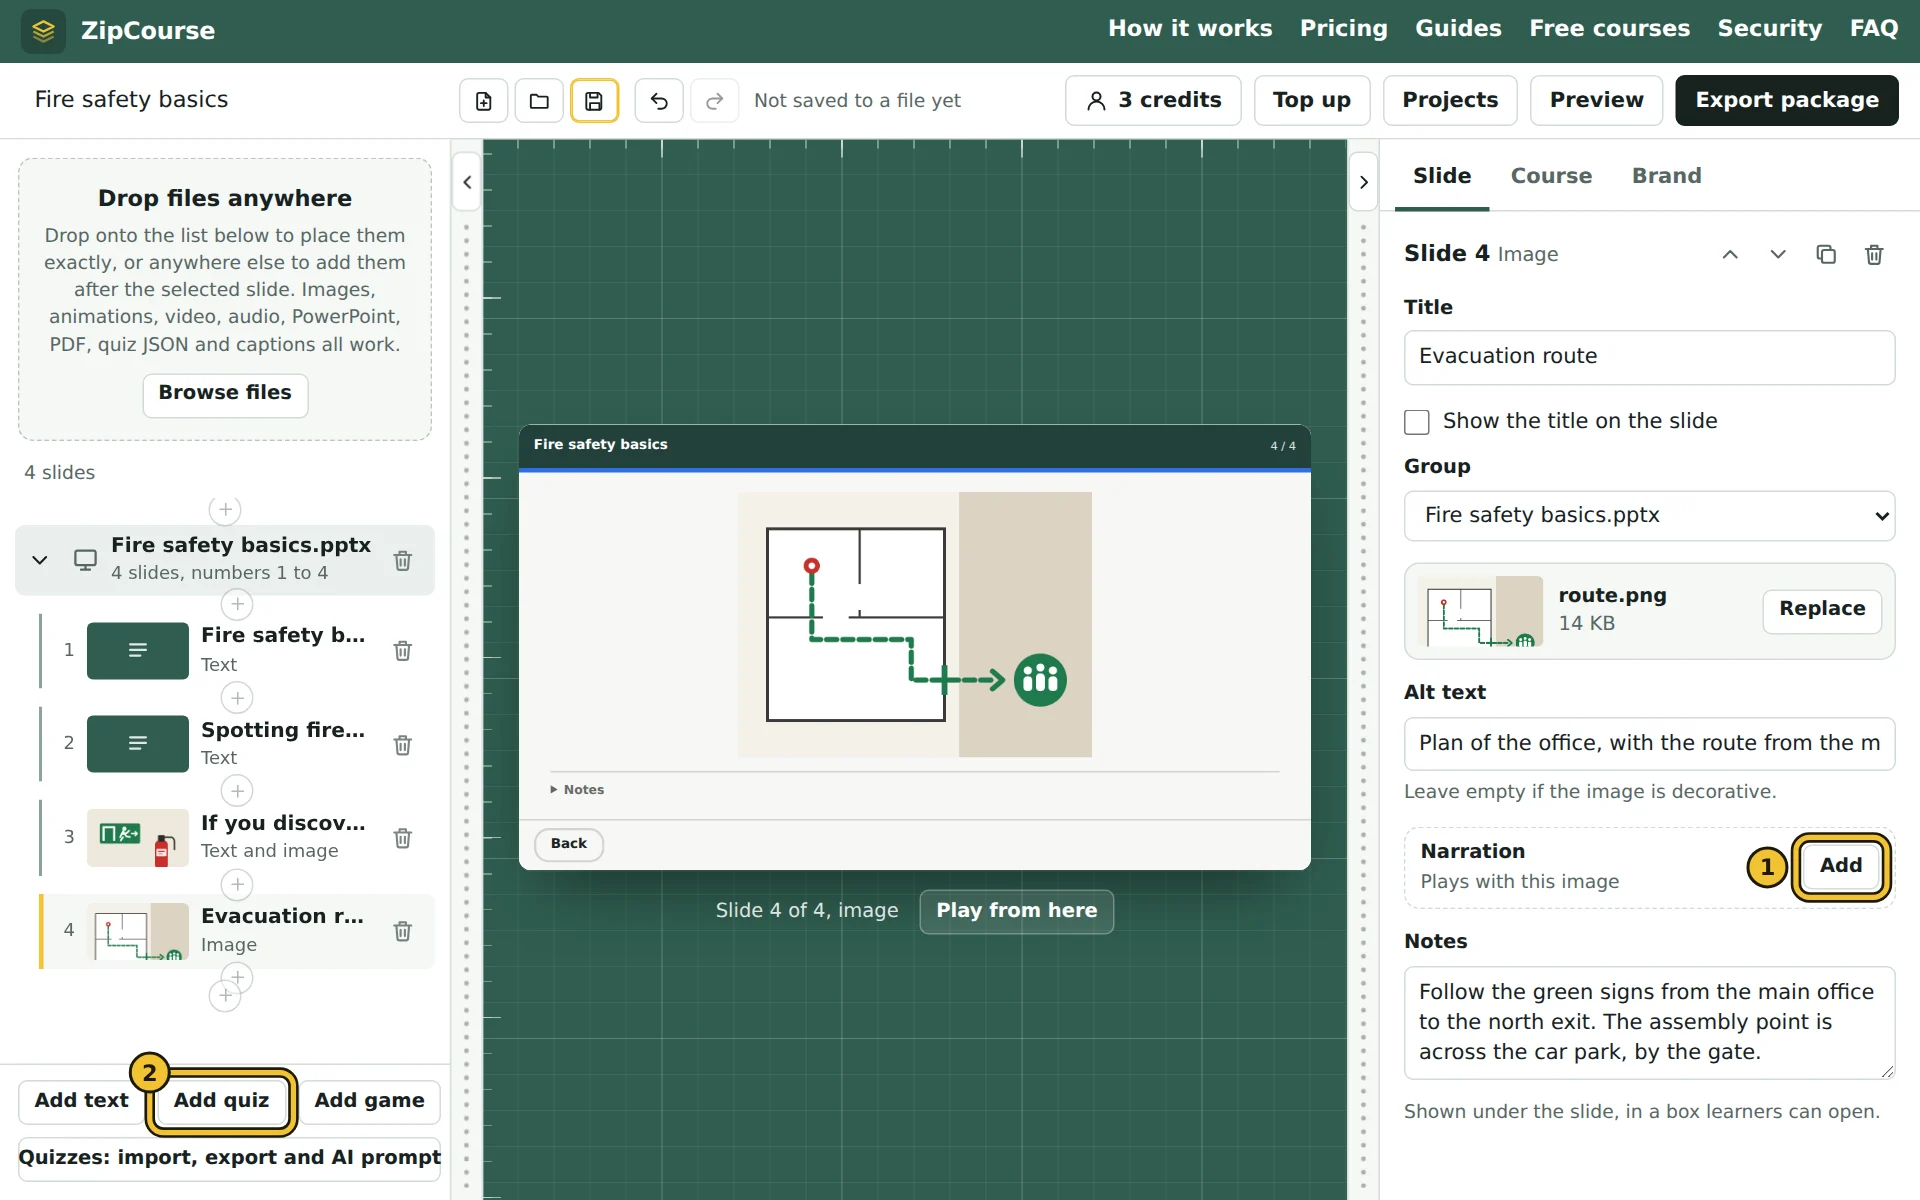
- 1Add next to Narration, then choose your recording.
- 2Add quiz puts a new quiz after the selected slide.
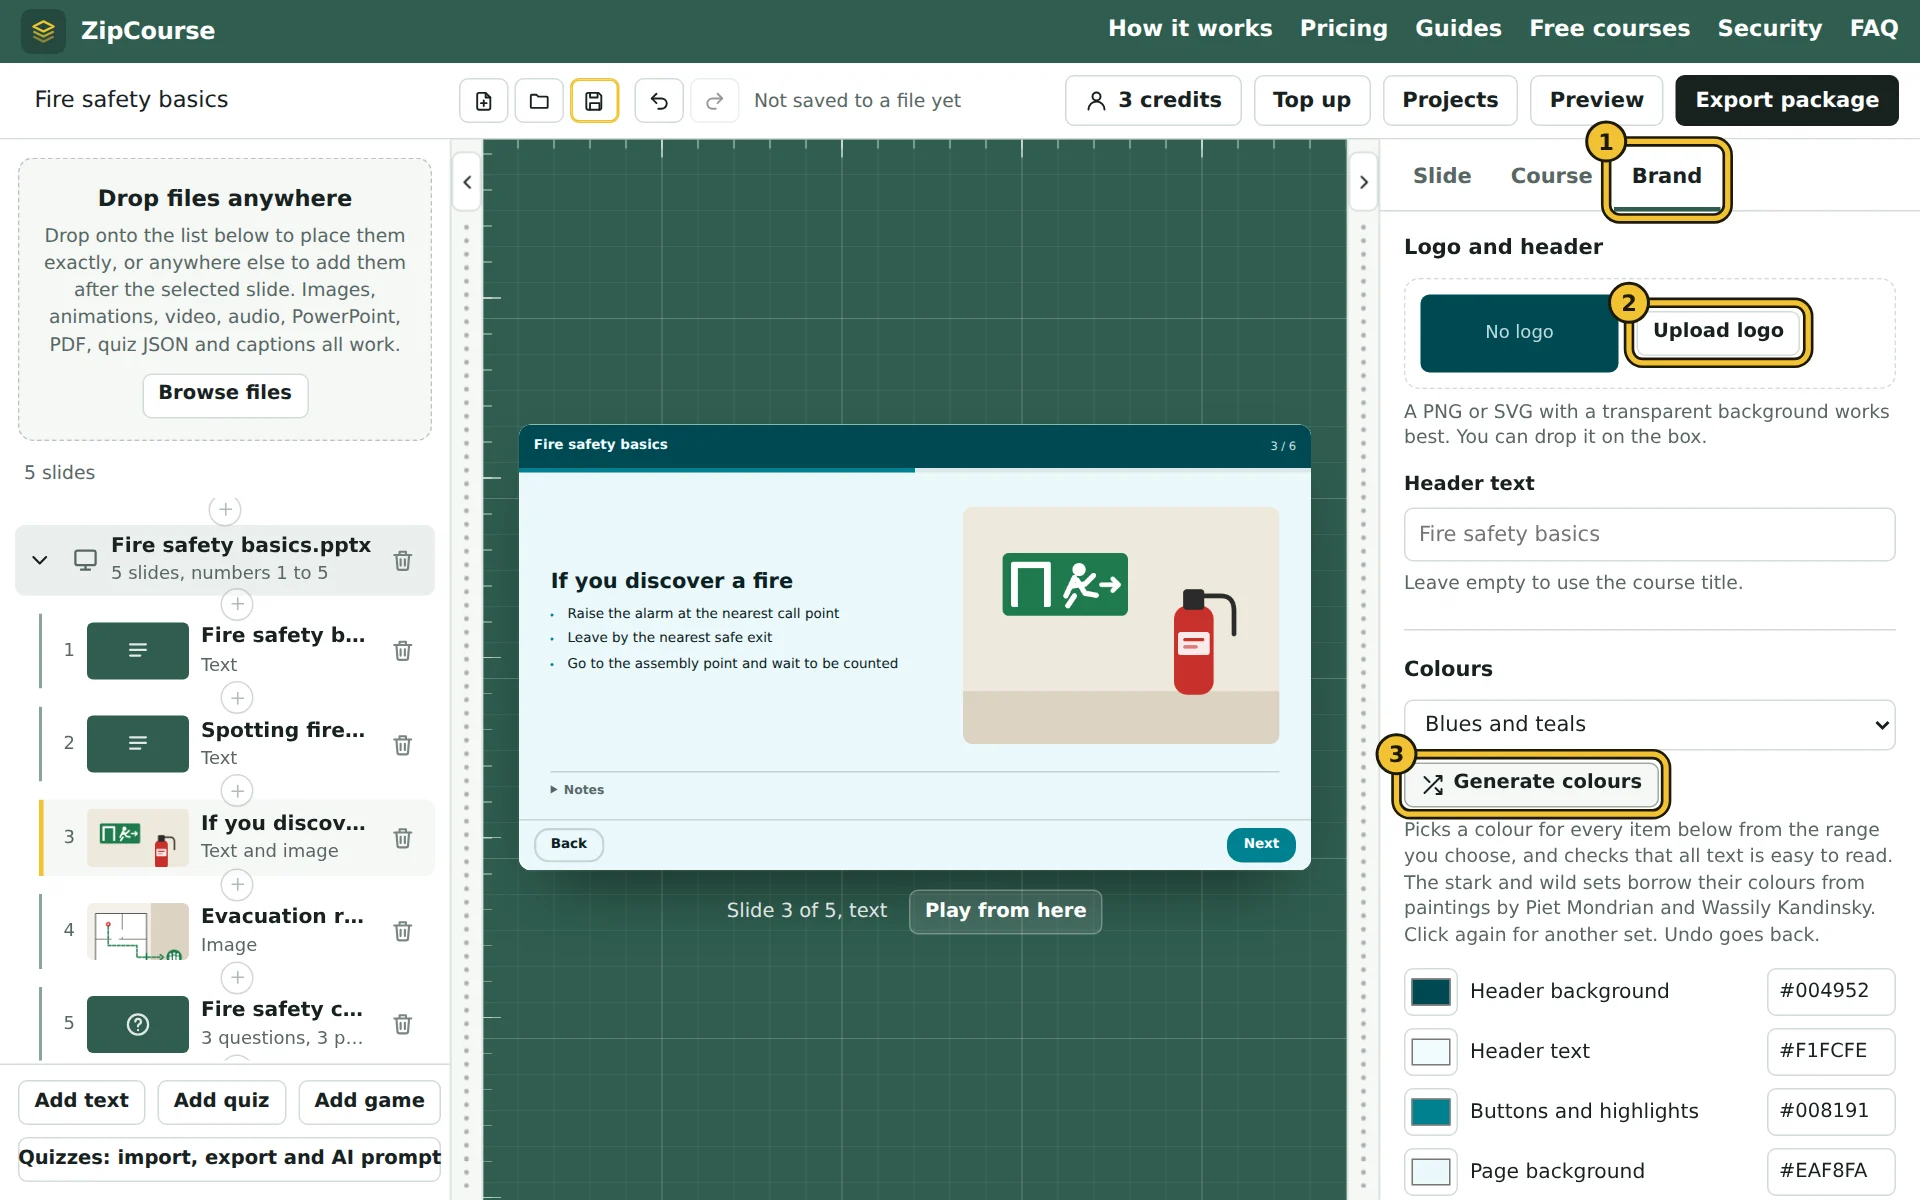
- 1The Brand tab.
- 2Upload logo, or drop your logo on the box.
- 3Generate colours. Click it again for another set.
4. Set how it's tracked
In the Course tab, choose what counts as complete (viewing every slide, finishing the quizzes, or both), the pass mark, and whether learners can skip ahead. Then press Preview: the LMS activity log beside the course shows exactly what your LMS will record. Course and Brand settings, explained covers every option.
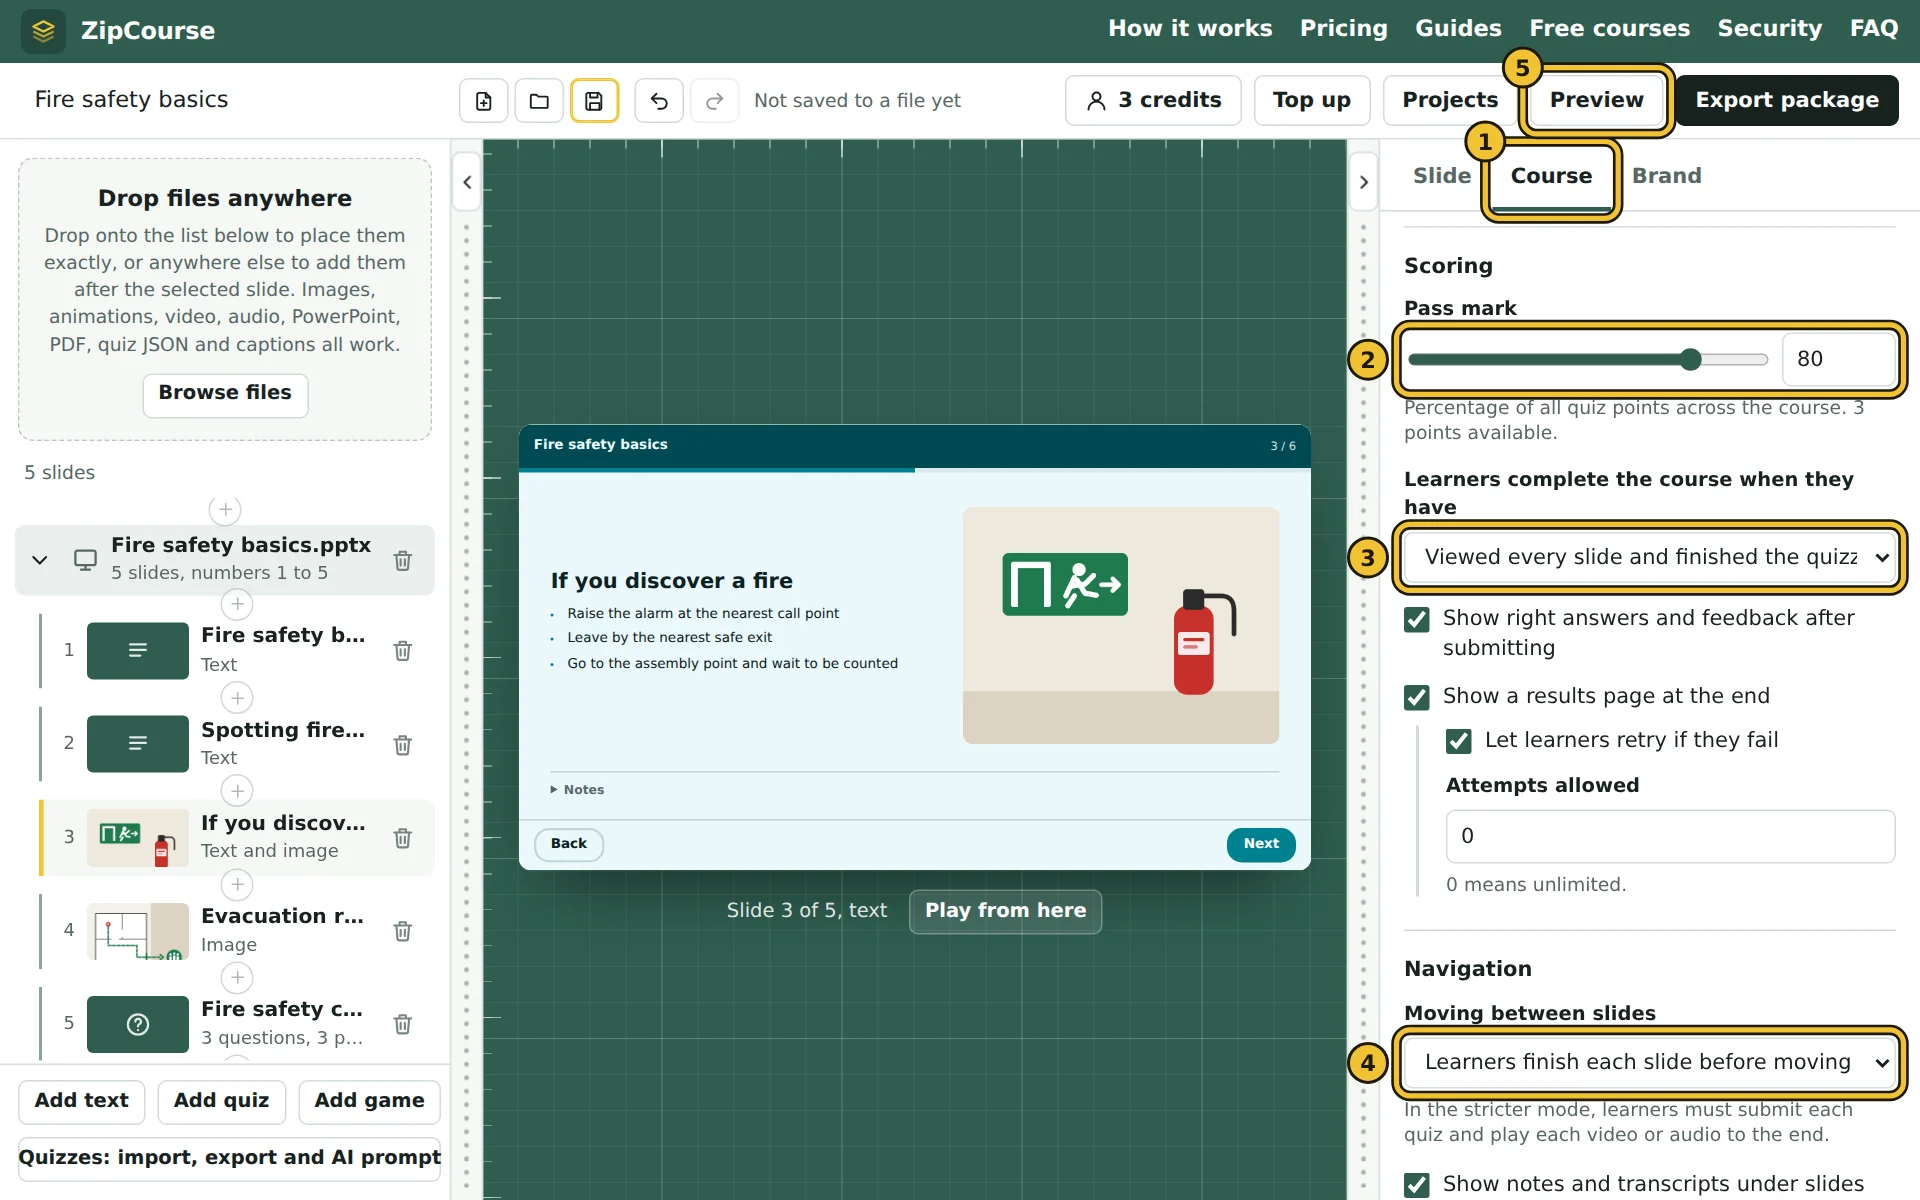
- 1The Course tab.
- 2The pass mark, as a percentage of all the quiz points in the course.
- 3What learners need to do to complete the course.
- 4Whether learners can skip ahead, or must finish each slide first.
- 5Preview, to try the course as a learner.
5. Export
Press Export package, at the top right, and choose a format. SCORM 1.2 works in almost every LMS; choose SCORM 2004 4th edition if your LMS supports it and you want completion and pass or fail reported separately (which one?). Exporting uses one credit, from £5 for 3 courses, and covers every format and up to 10 edits.
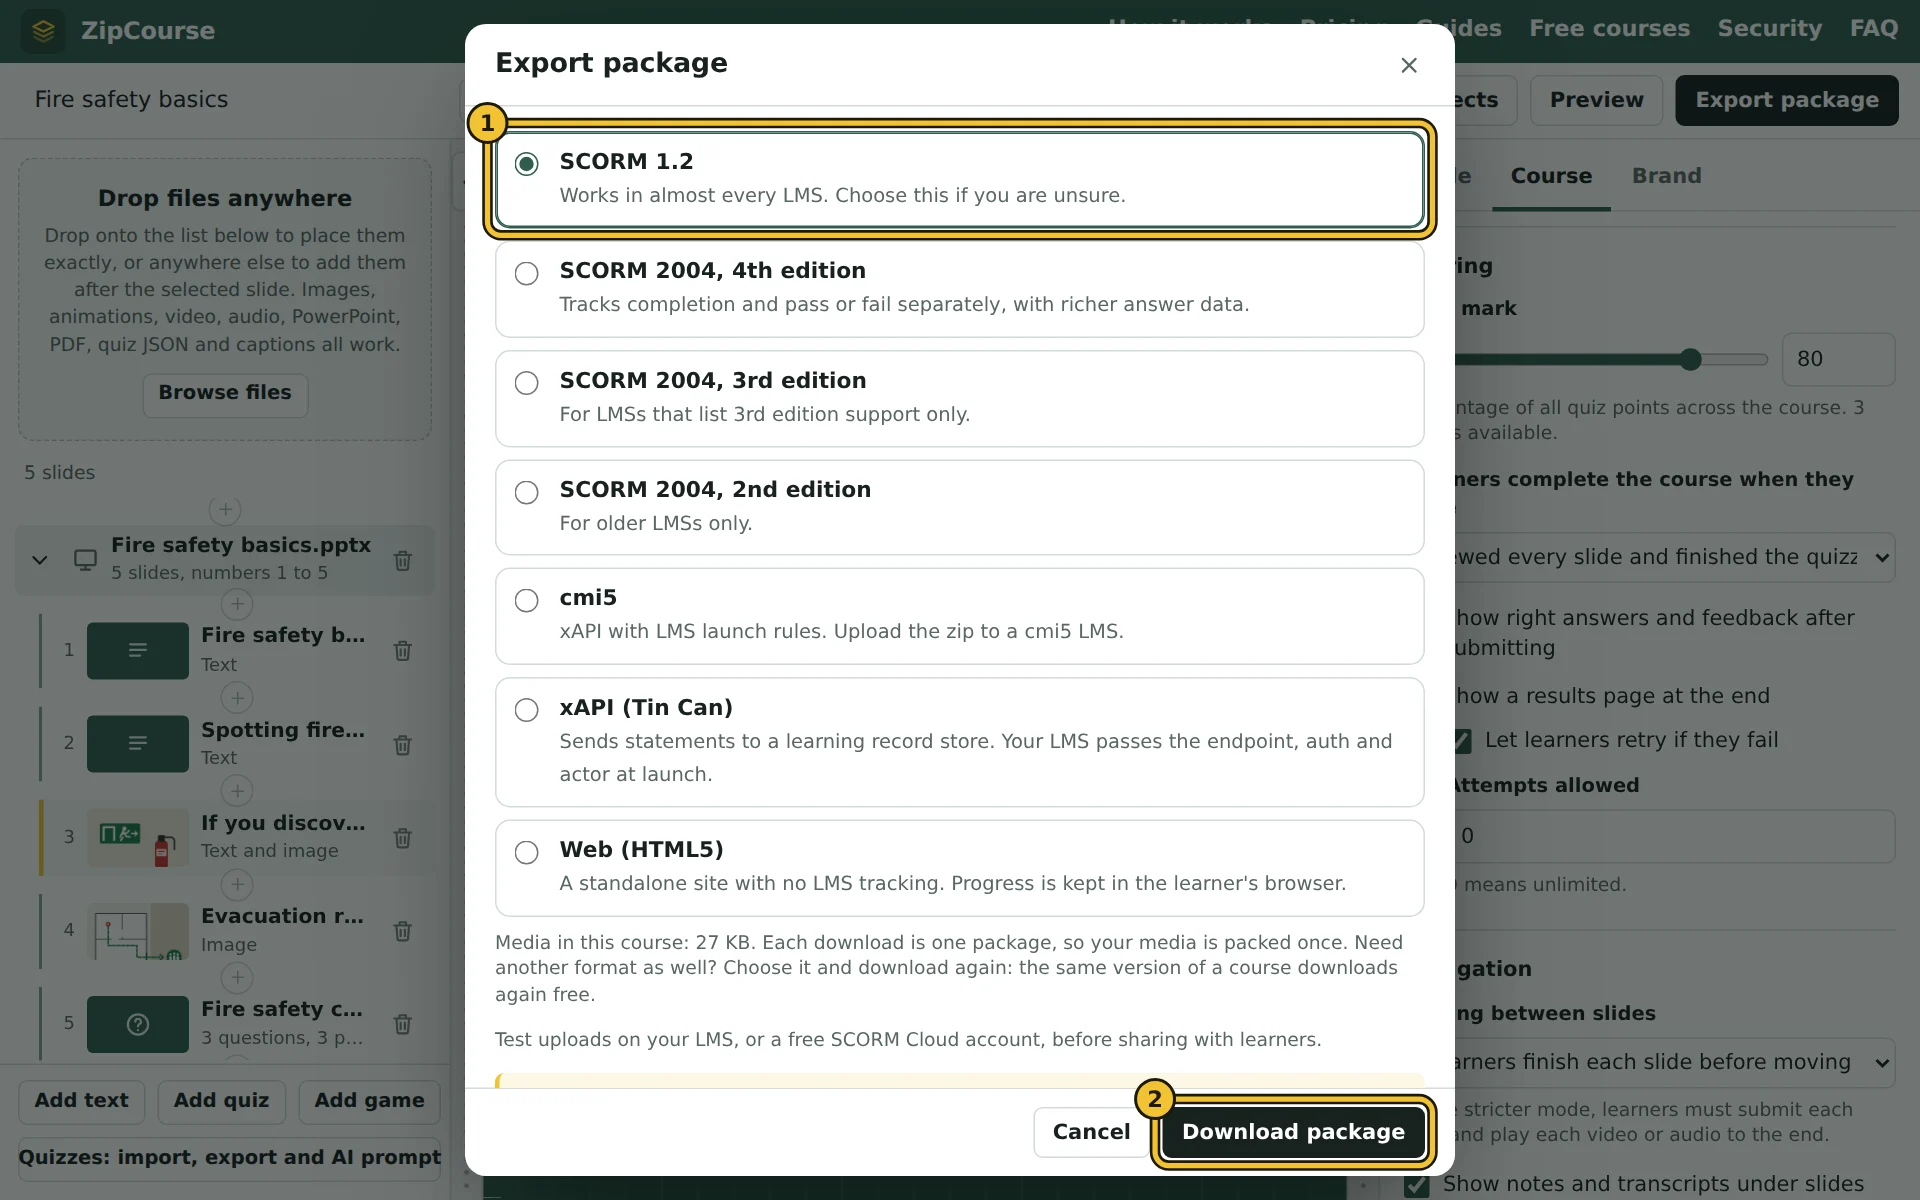
- 1Choose a format. SCORM 1.2 is chosen here.
- 2Download package. The window says what the export costs before anything is charged.
Upload the zip file to your LMS as a new SCORM course or activity. Don't unzip it first.
Common questions
Can I update the course later?
Yes. Edit it in ZipCourse and export again; it counts as one of the course's 10 edits. In your LMS, replace the package rather than adding a new course, so learners' progress is kept where your LMS supports it.
My deck has a lot of video. Will the package be huge?
Video is packed as it is, without re-encoding, and each download contains one format, so it's as small as your media allows. Check your LMS's upload limit before exporting a long video course, and see the video guide for tips on file sizes.